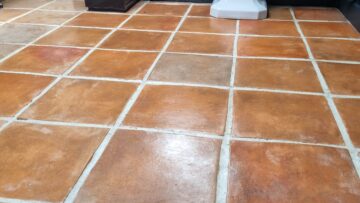
Cleaning During Floor Restoration
With the kind of abuse that floors receive – from foot traffic, to spills, scratches and even bearing the load of heavy items, they require finish coats to be applied to protect the furniture. This is also needed to enhance the slip resistance attributes of the surface, providing more traction to the people walking around in the premises. However, the success of the treatment used will be impacted by how the floor cleaning itself is carried out. Here are some tips to enable you to get optimal results from the process:
Getting the new pad ready
First, you’ll need to break in the floor pad of the machine that will be used. Breaking in the new pad will enable you to secure it properly on the floor cleaning machine. Take out the centre circle cut-out from that new pad and place it on the floor. Press the heel of your shoe against it, applying pressure on drive points of the centre of the circle, going in for about two inches. This action of softening and then compressing the pad centre makes it easier for the new pad to be fixed onto the pad driver.
Vacuum after each round of sanding
Usually, when applying finishes to installations like wood floors, there will be intermediate sanding between coats that are being spread on the floor. The dust particles generated can become troublesome if they get trapped under the fresh new coats being applied. A thorough vacuuming is required to remove the particles.
Note that the vacuum being used should have a hard surface attachment. Turn off the beater bar or rotating brushes, as these can cause further damage to the floor.
Follow the manufacturer’s instructions with regards to applying the finish coats on the floor. These range from the amount of coverage to spread over the surface, to the number of coats that will be required, as well as the drying times that will be involved in between the consecutive coats.
Definitely, once the floor finish has been applied and you have allowed the recommended drying time, you will need to test the surface to actually ascertain that it is ready to handle foot traffic. Head to the floor section that was the last to receive the treatment then place a paper on it. Preferably use copy paper. Stand on one foot, then place the ball of the other foot on this paper, gently moving it back and forth. Take care not to apply excessive pressure. Should the paper move easily over the floor, then you can go ahead and allow traffic back onto the area. If there is some resistance experienced, then the area is not ready for traffic.
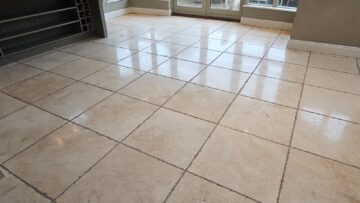
Cleaning after the floor treatment
Just because the floor has dried to a point of traffic being allowed on it doesn’t mean that it is ready for the usual mopping. Here, put off the wet cleaning until after the recommended curing time has elapsed. This is usually in the range of 5 days or a week. The specific duration will be included in the instructions of the floor finish being applied.
The kind of treatment applied will determine the range of floor cleaning products that can be safely used on the installation. From water-based to oil-based lacquers, these will have their compatible cleaning agents, and it should be incorporated on the product label which formulations are recommended to be used. Take particular note of this for the subsequent care and maintenance. That way you won’t end up in a situation where hard cleaners are used, which leads to the finish coats getting deteriorated, as this will call for the floor to be sanded and refinished much earlier than had been anticipated.
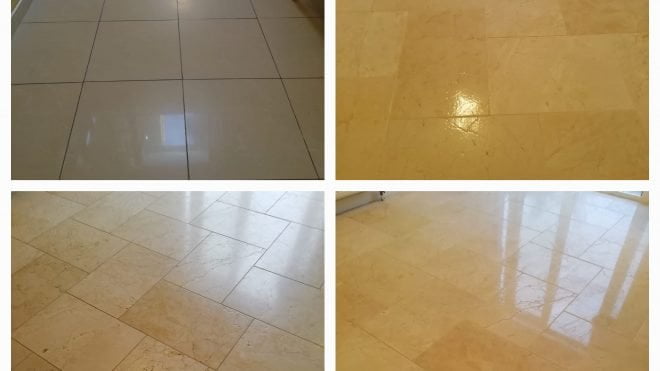
Protecting The Newly Finished Floor
You want to retain that elegant finish for longer. This calls for prudency with regards to the day-to-day floor cleaning and maintenance. Some measures that you should put in place include:
Setting up a welcome mat
The more dirt that is trapped at the door, the less threat there will be to the rest of the floor space. Having mats at the entrance of the building scrapes off the soiling that is at the bottom of people’s shoes – which is also handy in reducing the latter workload that will be required during the floor cleaning. Remember to have a routine schedule for cleaning the mats themselves, as well as regularly cleaning the area that is around the mats.
Furniture items – from that heavy sofa set in the lounge area, to the dining chair that are frequently moved around – can add to the strain on the floor. The scratches and dents that can be caused here will be detrimental to the longevity of your wood floor -but this effect can be minimised by having felt pads in place. In addition, whenever the furniture is to be moved – especially the heavy items, then it should be lifted and carried, instead of dragging it across the floor.
Trimming nails of pets
If you have cats or dogs in the premises, then definitely you are aware of the risks they bring to the floor- especially scratches. As the furry members of the house run around the premises, they have their claws drawn out to firmly grip the surface and give them traction. The unintended consequence of this is plenty of scorches being formed on the surface, taking away the appeal of the floor. Having a protective finish applied is the first line of defence, but this needs to be complimented by trimming the nails themselves. This is also a healthy part of the pet grooming, making it a win-win situation for both your floor and your pet.
Occasionally, having the floor given a thorough scrub by a professional cleaning team will be beneficial for its long-term protection. Here, the personnel come with high-powered equipment and as well as specialised floor cleaning agents to remove even those stubborn stains that had defied conventional methods during the routine DIY cleaning. Moreover, professional companies have access to a wider range of formulations which are not readily available over-the-counter due to the sensitivity of their application, and they have the skills needed to use them appropriately.